Why is the Shared Mailbox not visible in Outlook?
In some scenarios, you may face a situation where your shared mailbox is not showing in Outlook as it should. There’s a method that might take a little longer, but it can be a helpful workaround. The issue often relates to the auto-mapping feature in Outlook, which automatically adds shared mailboxes to your account. However, as your mailbox data grows, so does the size of your Outlook data file, and if it exceeds 50 GB, Outlook might have trouble handling the shared mailbox.
Here are some common troubleshooting steps you can try:
- Permissions: You might not have the necessary permissions to access the mailbox
- Admin Configuration: There might be an issue with how the Shared Mailbox is configured on the admin side. For instance, MAPI (Messaging Application Programming Interface)
- Outlook Client Issues: In some cases, your Outlook client itself might be the culprit. A corrupt profile, outdated version, or even temporary glitches can prevent the mailbox from showing up.
Here are some things you can try to troubleshoot the issue:
- Refresh Outlook: Sometimes, Outlook might not update immediately after a shared mailbox is added or permissions are changed. Try closing and reopening Outlook, or click on the “Send/Receive” tab and then click “Update Folder” to refresh.
- Restart Outlook: A simple restart can often resolve temporary glitches.
- Update Outlook: Make sure you’re running the latest version of Outlook. Updates often include bug fixes that might address this issue.
- Check Outlook Web App (OWA): If the mailbox shows up in OWA but not your desktop app, it points towards an issue with the client itself.
Solution 1: Check Permissions
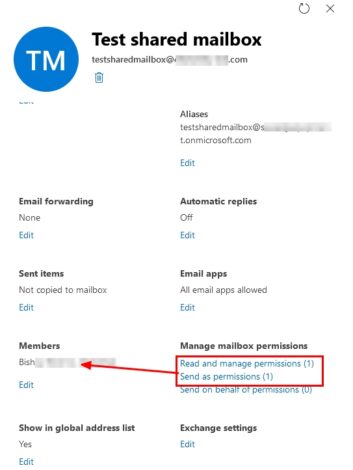
Ensure that you have the necessary permissions to access the shared mailbox. If you don’t have the correct permissions, the mailbox won’t appear in Outlook. Shared mailboxes require specific permissions like “Full Access” or “Send As” to be visible in your Outlook. If you believe you should have access, check with your administrator.
Access the AdminPortal OR from Exchange Admin Center (EAC)
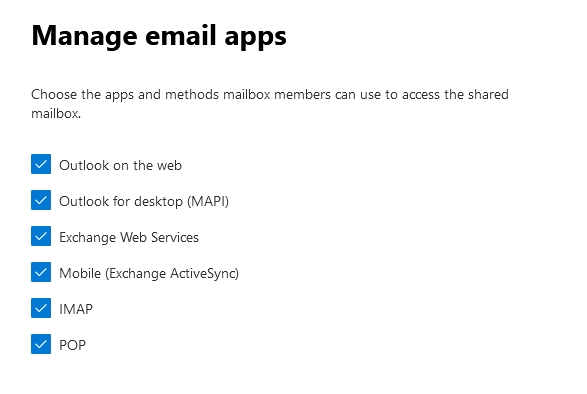
Solution 2: Check MAPI Configuration
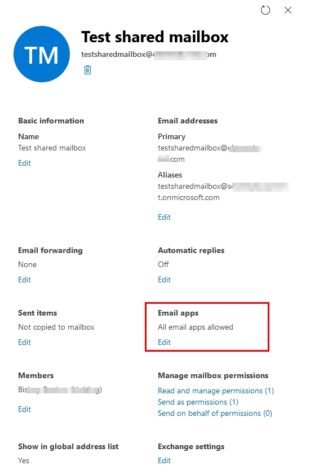
There might be an issue with how the Shared Mailbox is configured on the admin side. For instance, MAPI (Messaging Application Programming Interface) might be disabled for the mailbox, preventing it from showing up in Outlook. An administrator can check this setting in the Exchange admin center.
Solution 3: Add Shared Mailbox Manually
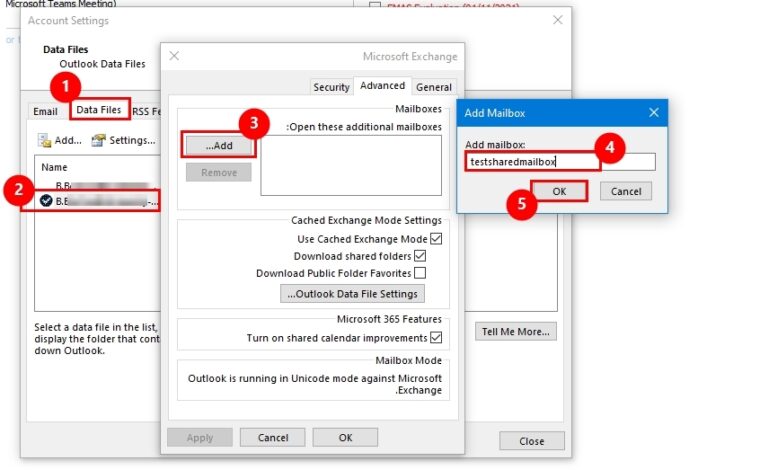
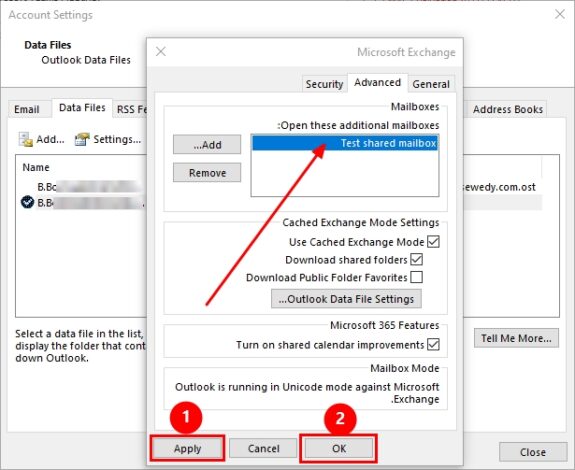
- Step 1: Open Outlook, go to File > Account Settings > Account Settings.
- Step 2: Under the Email tab, double-click on your mail to access the settings.
- Step 3: Click More Settings.
- Step 4: In the Advanced tab, enable the Download Shared folders options.
Solution 4: Check for Auto-Mapping and Disable
- Open Windows PowerShell on your computer, right-click it, and choose Run as administrator.
- In the PowerShell window, type the following command:
1 | $Credential = Get-Credential |
- A prompt will appear. Enter your Office 365 credentials.
- Now, connect to Exchange Online with this command:
1 | $ExchangeSession = New-PSSession -ConfigurationName Microsoft.Exchange -ConnectionUri “https://outlook.office365.com/powershell-liveid” -Credential $credential -Authentication “Basic” -AllowRedirection |
- This command establishes a connection to Exchange Online.
- Use this command to import the Exchange session:
1 | Import-PSSession $ExchangeSession |
- Once the connection is established and the session has started, remove the permissions to access the Shared Mailbox, use the following command:
1 | Remove-MailboxPermission -Identity complaint@domainname -User tony@domainname -AccessRights FullAccess |
- Replace complaint@domainname with the shared mailbox’s address and tony@domainname with your user’s email ID.
- In Outlook, go to Account Settings, select your account, and click the remove button to delete the shared mailbox.
- Now, it’s time to assign full access permissions again. Use this command:
1 | Add-MailboxPermission -Identity complaint@domainname -User tony@xyz.com -AccessRights FullAccess -AutoMapping:$false |
- Replace complaint@domainname with the shared mailbox’s address and tony@xyz.com with your user’s address.
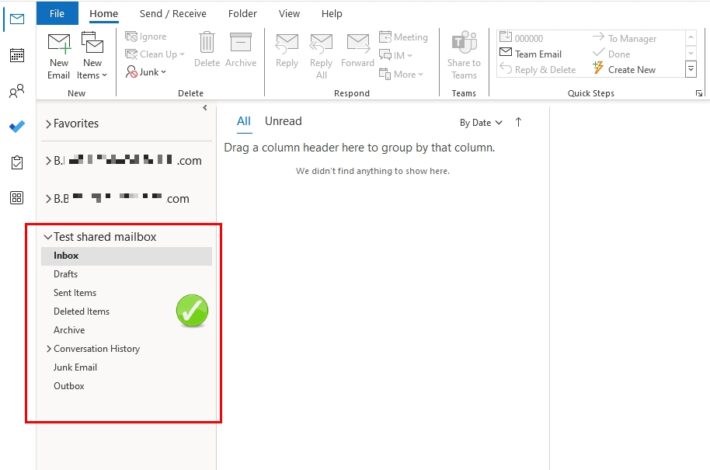
- Finally, add the shared mailbox just like you would add a regular account in Outlook, and you’ll be able to access its data.
Solution 5: Recreate Outlook Profile
Helpful Resources:
