In this article
Introduction:
Upgrade VMware vSphere ESXi is a critical task to ensure the stability, security, and performance of your virtual infrastructure. With each upgrade, VMware introduces new features, patches vulnerabilities, and enhances functionalities, making it essential for organizations to stay updated. In this guide, we’ll explore the various methods available to upgrade VMware vSphere ESXi, ensuring a smooth and seamless transition.
Main Objectives for Upgrade VMware vSphere ESXi:
- Comprehensiveness: Cover all common upgrade VMware vSphere ESXi methods, providing specific details about each.
- Clarity: Explain each method in a way that is understandable to users with varying levels of technical expertise.
- Engaging: Present the information in a well-organized and reader-friendly manner.
1- vSphere Update Manager (VUM): Centralized Management for Standardized Environments:
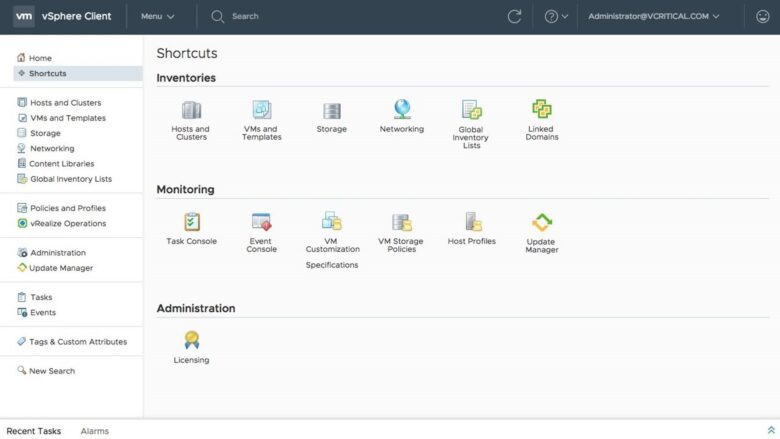
- Overview: VUM is a centralized patch and update management tool that simplifies the upgrade process. by creating baselines and scan ESXi hosts for compliance
- Schedule updates: during maintenance windows, ensuring minimal disruption to production environments.
- Centralized interface: to monitor the upgrade progress and automate the remediation process.
- Scenario: You have a vSphere ESXI infrastructure with standardized configurations and prefer a centralized approach with rollback capabilities.
- Example: Stage the ESXi 7.0.3 upgrade in VUM. Create baseline groups for hosts with similar configurations. Assign hosts to these groups and initiate the upgrade process. VUM handles downloads, staging, and installation centrally, providing progress tracking and rollback options.
- Pros: Centralized management simplifies upgrades, automated workflows, rollback options for added security.
- Cons: Requires VUM licensing, less flexible for diverse configurations, potential performance impact on large deployments.
2- vSphere Lifecycle Manager (VLCM): Automated Lifecycle Management
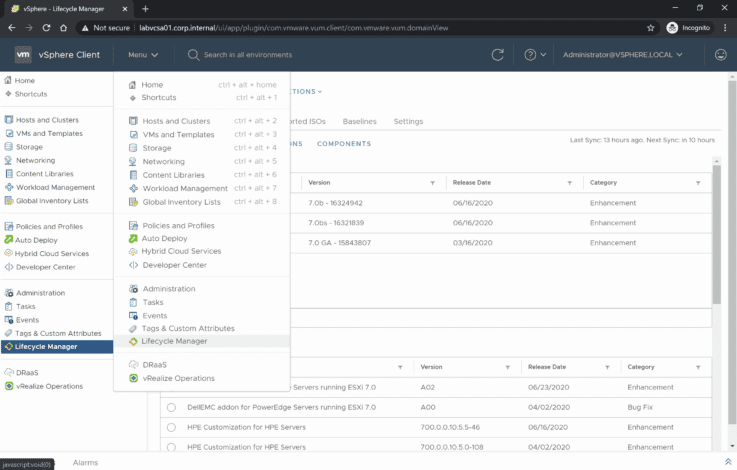
- Scenario: You manage a large-scale environment with complex lifecycle management needs and desire highly automated solutions
- Example: Create image profiles in VLCM, specifying the desired ESXi 7.0.3 version and configuration. Assign hosts to these profiles and initiate deployment or remediation. VLCM automatically downloads, stages, and installs the update across assigned hosts, providing comprehensive lifecycle management..
- Pros: Highly automated, scalable for large deployments, simplifies complex lifecycle tasks.
- Cons: Requires VLCM licensing, complex setup for smaller deployments, limited customization options compared to scripting.
3- Manual via ESXi ISO image [Offline Bundle]
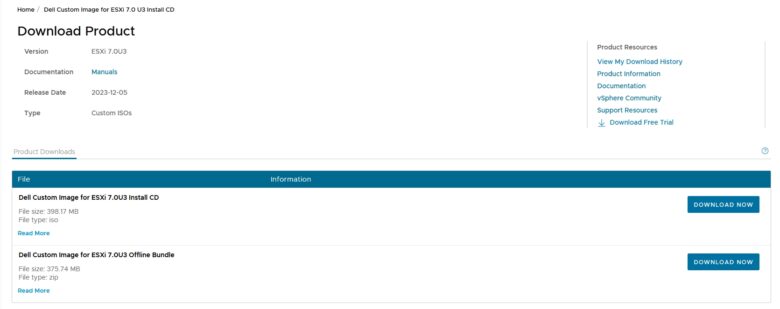
- Overview: This method involves creating a bootable USB or CD/DVD with the vSphere ESXi ISO image.
- Requires: careful planning and coordination to ensure that VMs are migrated or powered off before initiating the upgrade process.
- Suitable for: environments where vSphere Update Manager is not available or preferred.
- Scenario: You have a few standalone ESXi hosts and prefer a direct, user-friendly approach.
- Example: Download the ESXi 7.0.3 installer ISO from the VMware website. Create a bootable USB drive using Rufus or other tools. Boot your host from the USB drive, select the upgrade option, and follow the on-screen instructions. Migrate VM settings and data as needed during the process.
- Pros: Easy to use, allows individual host configuration, no scripting required.
- Cons: Time-consuming for many hosts, requires physical presence, limited automation.
4- Using the ESXCLI Command-Line Interface:

- Overview: VMware ESXCLI is a command-line interface that allows administrators to manage ESXi hosts, can be used to perform upgrades by installing patches or updating the ESXi software
- Suitable: for advanced users familiar with the command-line interface This method provides granular control over the upgrade process
- Scenario: You are an experienced user comfortable with command-line operations and require fine-grained control over the upgrade process.
- Example: Use ESXCLI commands like
esxcli software profile update -p ESXi-7.0.3-xxxxxx-standardto download, stage, and install the ESXi 7.0.3 update. These commands offer advanced control over specific aspects of the upgrade, but require careful execution and understanding of syntax. - Pros: Granular control for specific needs, scriptable for automation, advanced troubleshooting capabilities.
- Cons: Steep learning curve, error-prone if not used with caution, limited user-friendliness for beginners.
5- Scripted Upgrade: Automate Your Way to Efficiency:
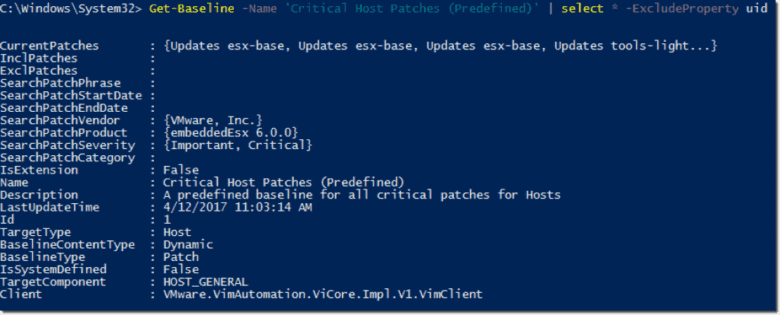
- Scenario: You manage a large cluster of ESXi hosts and want to automate the upgrade process for efficiency and standardization
- Example: Write a Python or PowerCLI script that defines the upgrade process, specifying the installer source (e.g., local repository), target host(s), and upgrade options (e.g., specific version, data migration). Execute the script using tools like PowerCLI or integrate it into your automation workflows..
- Pros: Efficient for multiple hosts, repeatable with minimal manual intervention, customizable workflows.
- Cons: Requires scripting knowledge, potential for errors if not carefully developed and tested.
6- Auto Deploy for Large Environments:
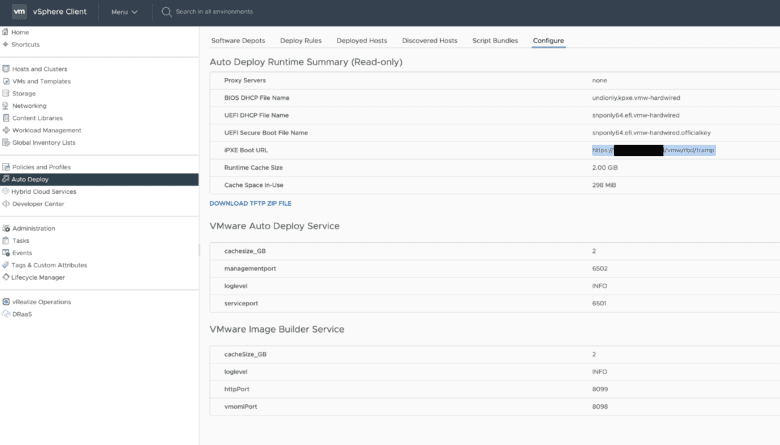
- Overview: Auto Deploy streamlines the ESXi deployment and upgrade process for multiple hosts
- Auto Deploy integrates: with vSphere Update Manager, allowing you to automate the deployment of ESXi patches and updates.
- Scenario: Imagine managing a large data center with hundreds of ESXi hosts. Manually upgrading each host would be time-consuming and error-prone. Auto Deploy streamlines the process.
Create an Auto Deploy profile and Define the desired ESXi version, network settings, storage configuration, and security policies. then ssign the profile to new or existing hosts. Auto Deploy automatically downloads the image, configures the host, and joins it to vCenter Server. - Example: you need to upgrade 50 ESXi hosts from version 6.7 to 7.0. With Auto Deploy, Create an Auto Deploy profile with the vSphere ESXI 7.0 installer.Assign the profile to the 50 hosts, Auto Deploy handles the upgrade process for each host automatically, minimizing downtime and manual steps.
- Pros: Automation, Scalability, Consistency, Reduced Downtime, Error Reduction
- Cons: Complexity, Limited Customization, Troubleshooting, Dependencies
Additional Considerations:
- Backup: Always back up critical data and configurations before initiating an upgrade VMware vSphere ESXi to avoid data loss.
- Prerequisites: Verify compatibility, backups, hardware requirements.
- Best Practices: Plan thoroughly, test in non-production, minimize downtime.
- Optimization: Update third-party software, consider hardware refresh.
- Security: Maintain security patches, follow VMware recommendations.
Conclusion:
By understanding these methods and their strengths, you can choose the approach that best aligns with your environment and expertise. Embrace the power of VMware vSphere ESXi for a virtual infrastructure that’s secure, optimized, and ready to fuel your business innovation!
By following these methods and best practices, you can successfully Upgrade VMware vSphere ESXi, ensuring a secure, performant, and feature-rich virtualized environment.
